I was getting ready for a long train ride from KY to DC and found out there aren’t any AC outlets for coach seats! A 15hr ride isn’t too bad when you have a smart-phone; then again, the stock battery on an HTC Incredible will last only about 3hrs of heavy usage. Not good. I wanted a way to be able to use it for, well, 15hrs. So, using some easy-to-find parts I made an extended battery that will charge the phone via USB. I also wanted the extended battery to be rechargeable. So, I need to be able to have access to the battery contacts; maybe later I will add something fancier, but for now the battery disconnects from the USB circuitry. Here’s my finished product, and how to make it.
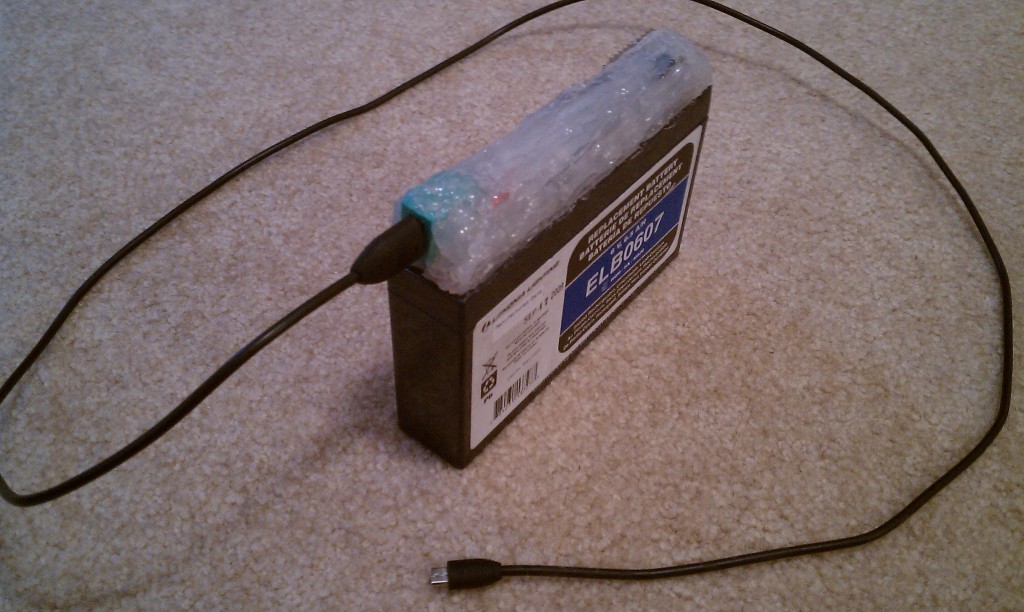
I bought a battery from the local Home Depot for $20 (look in the outdoor lighting aisle). It is 6V and provides 6.5AH. You can get it cheaper at places like batterymart.com, but I was in a hurry and the shipping on seal-lead acid batteries is not cheap. The higher the amp-hours (6.5AH in this case), the longer you will be able to run your USB device.

Now for the voltage – USB uses 5V DC. I needed to drop the voltage from 6V to 5V, preferably without too much loss. There are three main options: voltage divider using resistors, non-switching regulator, and a switching regulator. In the case of the voltage divider, the resistors basically turn the extra voltage into heat, and they would need to be rated for higher power than the typical $0.01 resistors. Switching regulators, or DC-to-DC converters, are much higher efficiency, but are more costly. Also, I couldn’t find one that would work at Radio Shack, so I went with a non-switching regulator: the 7805.
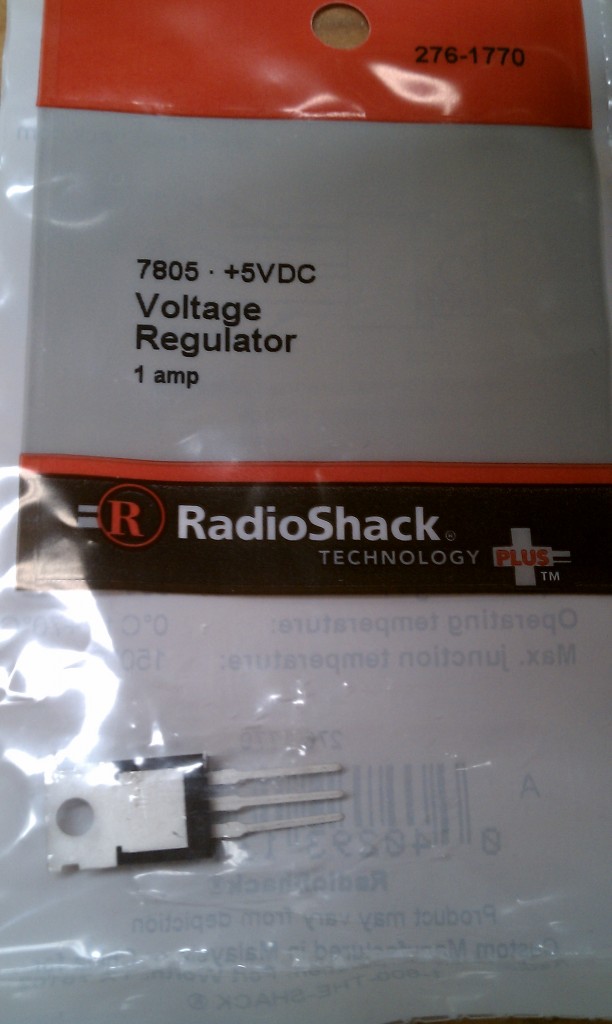
The 7805 regulator will take voltages higher than 5V and hold them at 5V, also allowing up to 1A of current. While that’s much more than is needed, it gives a nice buffer. A regulator has three legs: 1) input, 2) ground, and 3) output, where the ground leg is shared between the input and output. The input comes from the positive side of the battery, the output goes to the 5V pin on a USB connector, and the negative side of the battery along with the GND pin on a USB connector both connect to the ground. Since the 7805 drops the difference in voltage by heat, adding a heatsink to the regulator might be needed, depending on how much power your device will draw.


To connect USB devices, I need an adapter that would allow me to plug in a standard USB cable, like the one in your computer. I happened to have an old PS2/USB adapter from an old mouse. It hasn’t been used, ever, so I cut it up (the green thing above). You could use something else, like a USB extension cable which already has wires to solder to. USB connectors have 4 pins: 1) 5V, 2) Data+, 3) Data-, and 4) GND. Use some wire to solder the connections (USB 5V -> 7805 Output), (USB GND and Battery negative -> 7805 Ground), and (Battery positive -> 7805 Input). Make sure to protect the solder points with some heatshrink or risk shorting, melting, and other bad things. To connect the wires to the battery terminals, I used spade connectors. Also, leave the terminals pointing up for reasons I’ll point out soon.


Once the soldering is done, connect the battery and use a multimeter to check the output on the USB connector (voltage across pin 1 and pin 4 should be +5VDC). Then you can freely connect a USB device and you’re set. You could stop here and be done. Since I wanted this for travel and didn’t want exposed wires, I took it a step further: enter hot glue.
Clean the top of the battery and add a layer of lubricant (e.g. WD-40) to keep the glue from sticking to the battery. We want the circuitry to be detachable so that we can recharge the 6V battery using a trickle charger/car charger. This is why I left the battery terminals sticking up – so that I can freely pull the circuit away from the battery. I used about 10 – 15 sticks of hot glue used on a mini gun, just to make sure that everything would hold together. This is the most time-consuming part. It doesn’t take a lot of thought to do this. Just fill in all the holes, keeping the USB port accessible. You also want to keep the heatsink partially uncovered so that it passing air can pull away the heat given off by the 7805 regulator. You could spend a lot of time getting this pretty by squaring up the sides and making it colored, but this was a last minute project for me. Hopefully you will get some good use out of this – I know I will. I hope they don’t kick me off the train thinking it’s a bomb.


October 16, 2024 at 7:01 pm
A very good article has been written brother, this article is so good, I liked it a lot, I will also share it UP Scholarship
October 17, 2024 at 6:22 am
This post was well-researched and thorough. I learned a lot! pafi medan
October 20, 2024 at 8:04 am
I’m always impressed by the depth of your articles
sultanlotre
October 20, 2024 at 10:19 am
I admire the passion that goes into this site.
October 21, 2024 at 1:10 am
To help you fully understand the material, CertsOut CompTIA 220-1101 questions answers. These answers not only explain the correct choice but also help clarify why the other options are incorrect. This deeper understanding of the questions will ensure you’re well-equipped to handle any question on the exam.
October 21, 2024 at 9:04 pm
I can’t thank you enough for being a rock in my life and for everything you’ve done to help me grow personally and professionally. capybara clicker game
October 22, 2024 at 2:14 am
Ayo mainkan Fun Lotre dan nikmati kesempatan menang besar setiap hari. fun lotre
October 22, 2024 at 6:50 am
The website stands out with its clean design and intuitive navigation,
making it easy for users to find what they need.
Hokqbet88
October 27, 2024 at 6:24 am
Kunci hidup sehat: perawatan tubuh dan keseimbangan pikiran.
October 27, 2024 at 6:28 am
Rekomendasi gadget terkini untuk gaya hidup yang praktis.
October 27, 2024 at 8:05 am
great issues altogether, you simply won brand new reader. What may you recommend about your put up that you made a few days ago? Any positive?
October 28, 2024 at 2:56 am
Great post! Your insights on web development USA were spot-on. If you’re looking for more detailed information,
https://srptechs.com/web-development/
October 28, 2024 at 4:08 am
At its core, the escort industry involves providing companionship and related services for a fee. While often enveloped in stigma and controversy, the demand for companionship has always existed, transcending geographical and cultural boundaries. In Lahore, this industry is characterized by a blend of traditional values and modern desires, mirroring the city’s
October 28, 2024 at 4:09 am
Lahore, the cultural capital of Pakistan, is a city known for its rich history, vibrant art scene, and bustling social life. Among its many facets, the escort industry has emerged as a notable element of urban lifestyle. The phenomenon of escorts in Lahore reflects a complex interplay of societal attitudes, economic factors, and individual agency, warranting a closer examination.
October 28, 2024 at 6:36 am
Harga sulam alis microblading di Surabaya sekitar Rp2.500.000 hingga Rp4.000.000, cocok untuk hasil detail.
October 28, 2024 at 1:17 pm
That’s some impressive DIY work! A 15-hour train ride with no AC outlets sounds rough, but your rechargeable extended battery solution is genius. If you ever want to document and share these creative projects, you might consider hire a writer for biography—it could turn these inventive experiences into an engaging read!
October 28, 2024 at 2:27 pm
If a man wants a girlfriend who can bring him the most happiness, Lahore Call Girls service might be the best choice. Some of Pakistan’s most beautiful women and escort girls work as call girls in Lahore. They know how to make any man feel special.
October 29, 2024 at 1:31 am
Thanks for information. Keep sharing more articles.
November 10, 2024 at 7:06 am
Resep Sup Vegetarian: Sup vegetarian dengan sayuran kaya serat dan vitamin, sempurna untuk pola hidup sehat.
November 10, 2024 at 12:11 pm
Simulasi Virtual Pendidikan: Pembelajaran berbasis simulasi virtual yang membantu siswa memahami konsep dengan pengalaman langsung.
November 10, 2024 at 11:40 pm
Nice post.
SkinLite Hydroquinone + Tretinoin Furoate Cream 25 g In Dubai
November 17, 2024 at 8:44 am
Hello, nice post. Thank you for your kind information and for playing a game in the traffic pro to enjoy the movement.
November 25, 2024 at 5:14 am
Great information. Looking for Sop for Mba? Look no further! At SOP Consultants, We offer Expert sop for Mba Assignment writing services at an affordable price. Reach out to us today and discover how we can help you to success in your Mba Assignments!
February 2, 2025 at 4:05 pm
Informational details shown here Switchboard Manufacturers
March 23, 2025 at 9:29 am
Looking for the best Philippines medical college with affordable fees and top-quality education? Education Vibes provides expert guidance to help you choose the right university and navigate the admission process smoothly
June 8, 2025 at 6:06 am
This website is a treasure trove of useful information! Its clear how much thought and dedication went into it. Thank you for sharing your knowledge with us.
June 15, 2025 at 10:15 am
Your take on this topic brings a new perspective. I hadn’t thought of it that way before.
June 29, 2025 at 6:43 am
I truly appreciate the effort behind this amazing website. Its a wonderful resource that has made my life so much easier. Thank you for creating something so impactful.
July 20, 2025 at 6:29 am
Every time I visit your website, Im amazed by its quality and content. Its clear that its made with care and passion. Thank you for creating such a great platform.
July 27, 2025 at 6:48 am
Love this! Bookmarking for future reference. Thanks for sharing! toto besar